
Uploading iOS app to App Store | Beginner’s iOS Guide 2021
This is the most necessary step to make your app publicly available. To be able to submit the app to the App Store, you need to register to Apple Developer Program.
Note : Your apps are removed from the App Store if you fail to renew your membership annually.
Before your app is live in the Apple App Store, it needs to go through an app certification process. It sounds scary but it’s essentially just a person who tests out your app and makes sure that it conforms to App Store guidelines before approve it for publishing into the app store.

Step 1 :
Login into App Store Connect.
Step 2 :
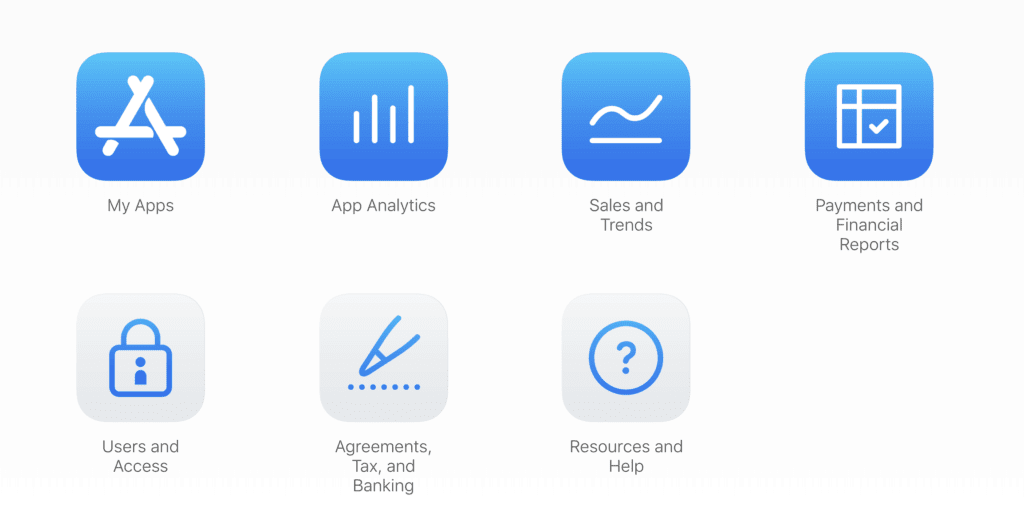
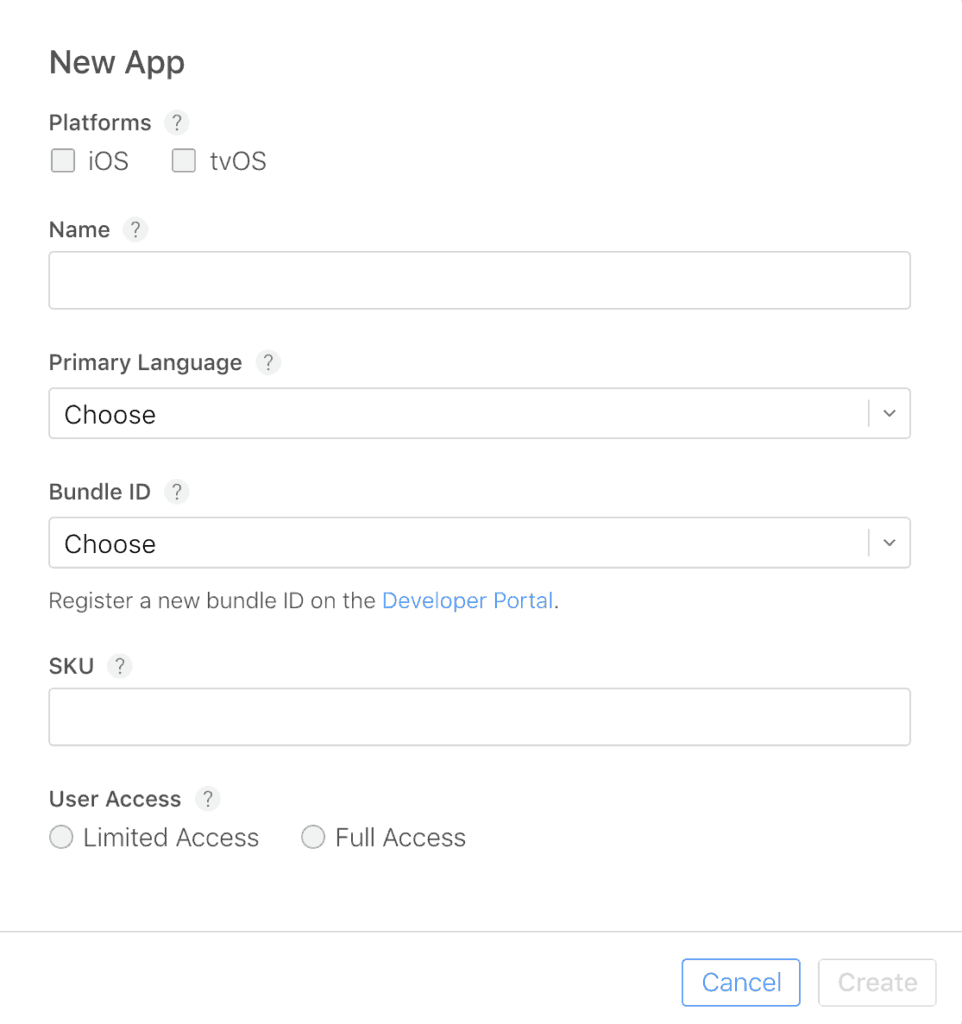
Go to “My Apps” > Select the “+” option to create your App Profile. Fill in all the information and click “?” for additional help. If you already have created your App Profile then skip this step.
Step 3 :
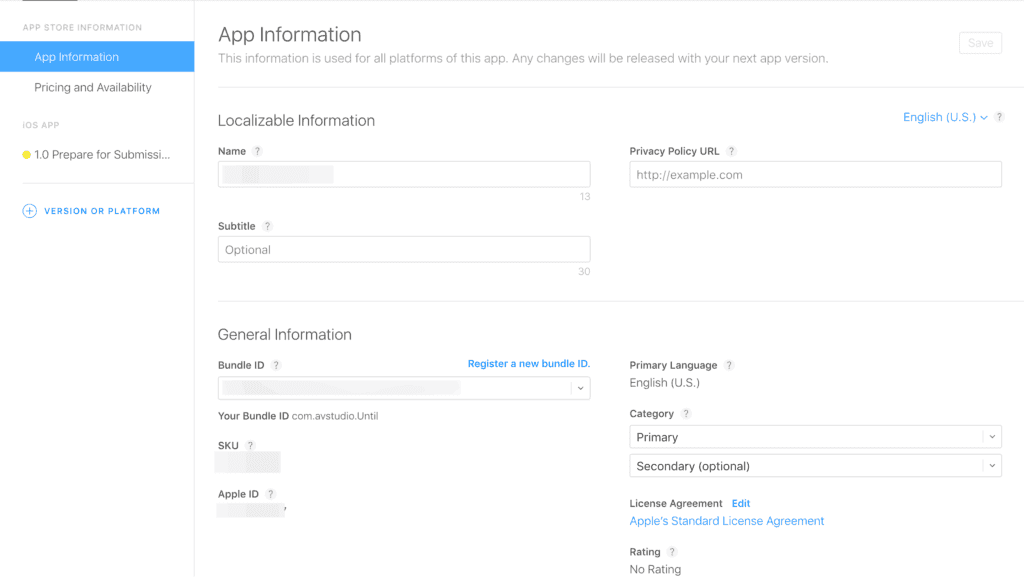
Next, you have to fill in all the information about your app. The name, description, the app category, the minimum age of the audience, and a privacy policy and support URL.
If your app is based on social media and demands a login, you have to provide a test account and password for the Apple reviewer.
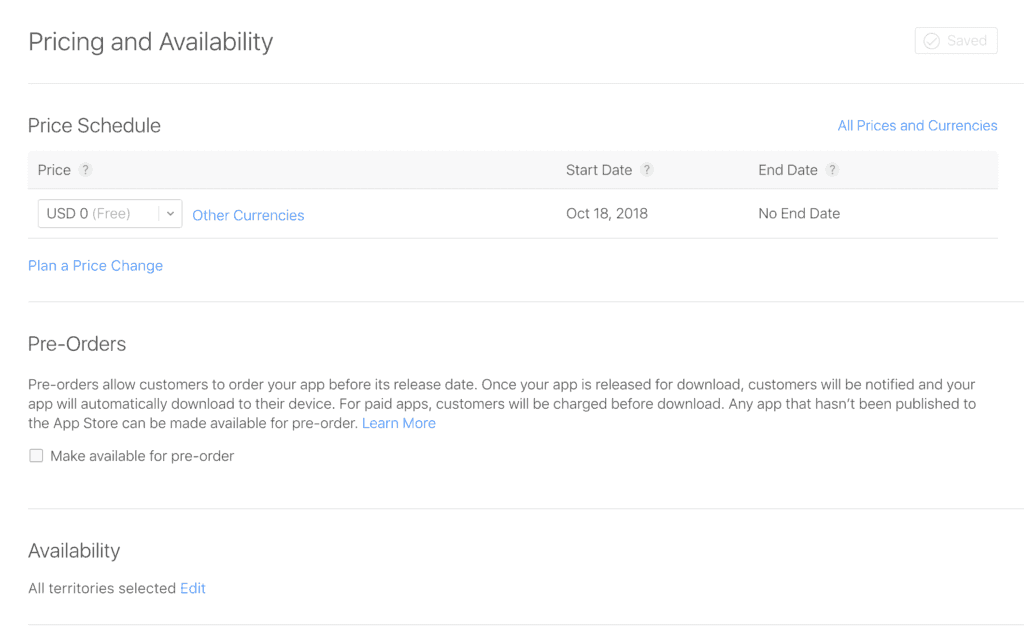
Step 4 :
Decide on the pricing of your app on this screen:
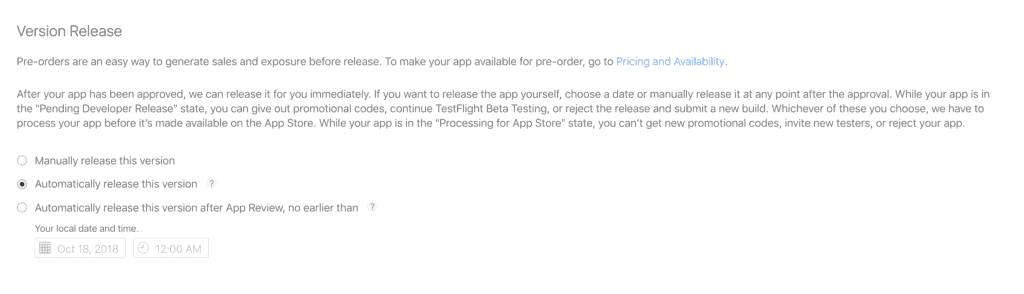
Step 5 :
You can choose app release method after it passes the certification process.
- Manually: you’ll have to go into App Store Connect and release it
- Immediately: To released as soon as it passes certification
- On a date: To publish on a specific date (if it has passed certification)
Step 6 :
Use this link to go read more about the screenshots needed by the App Store, especially if you have multiples sizes to cover like iPad, Apple Watch, etc. Upload the screenshots required.

Step 7 :
Next, let’s release the app for upload from Xcode.
First, your app needs to run properly and be clean of errors (the red warnings).
Second, you should have your Signing and Team information set up in Xcode.
Don’t forget you should have your app version set to 1.0.0 if you are publishing a new app (or remember to increment the build version if you are publishing an update).

Step 8 :
To create the full app archive, you first need to select the Generic iOS Device from the list of simulators.

Now go to Product >> Archive and let it bundle your app. This can be a pretty lengthy process depending on the size of your app.

Once done, you will be navigated to the Archive window showing all Xcode archives

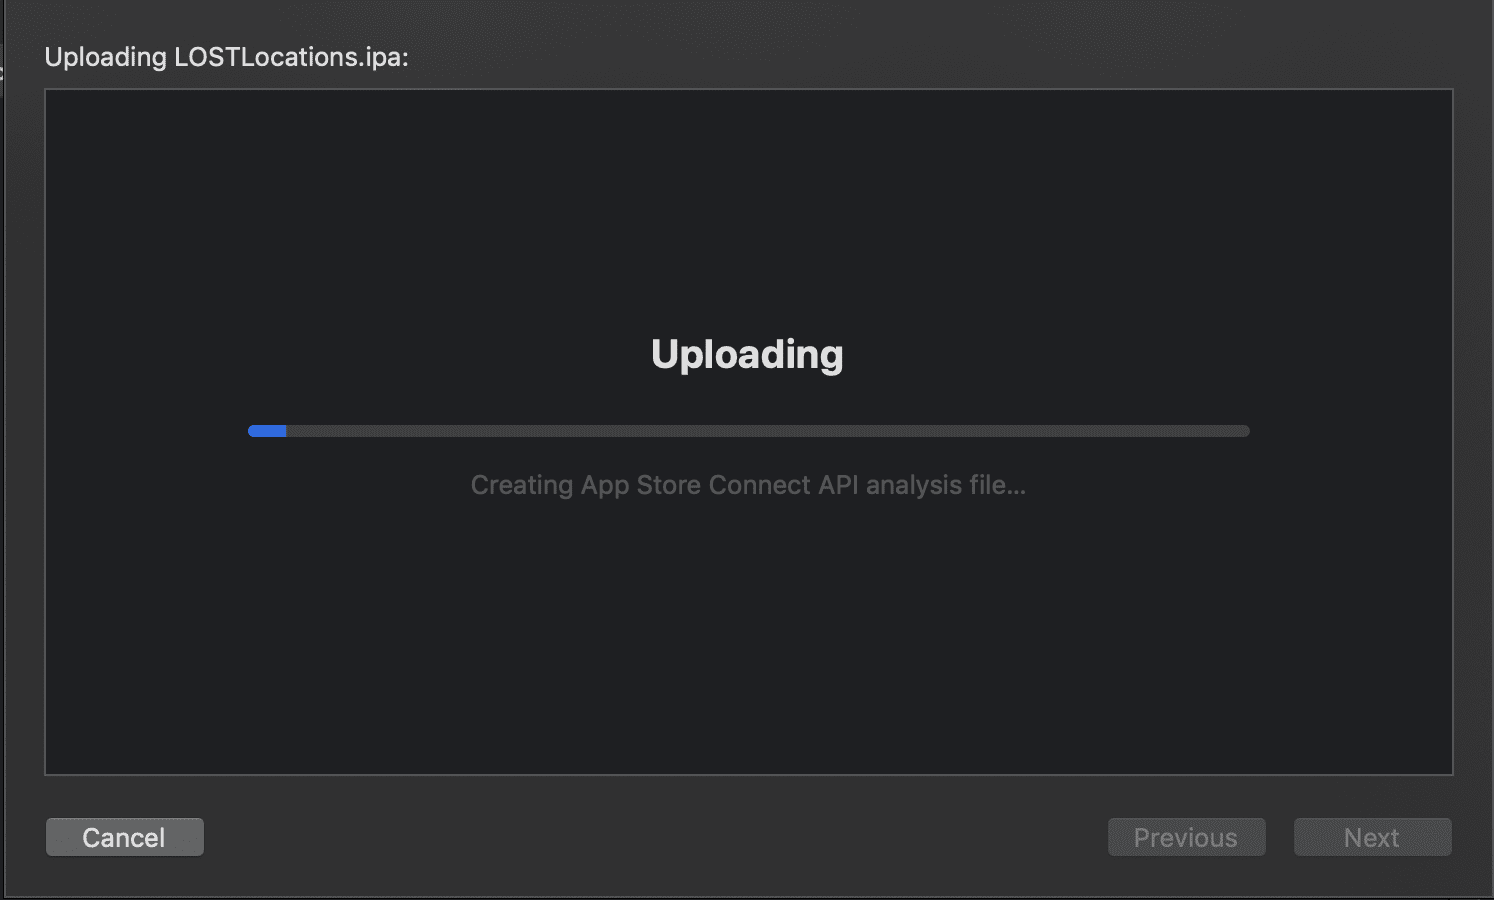
Step 9 :
Now select the archive and choose Distribute App. Select the method of distribution as iOS App Store
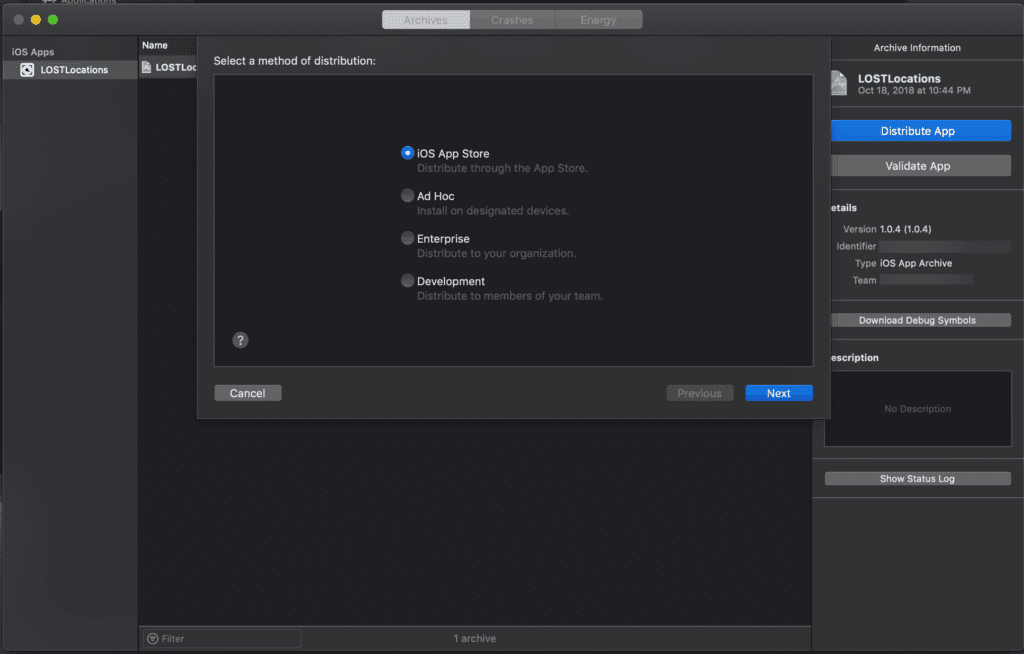
It will go over a couple of checks and validations to make sure you are not uploading a broken app. You will see the popup displaying app details, check that the selected provisioning profile is correct, and click next.
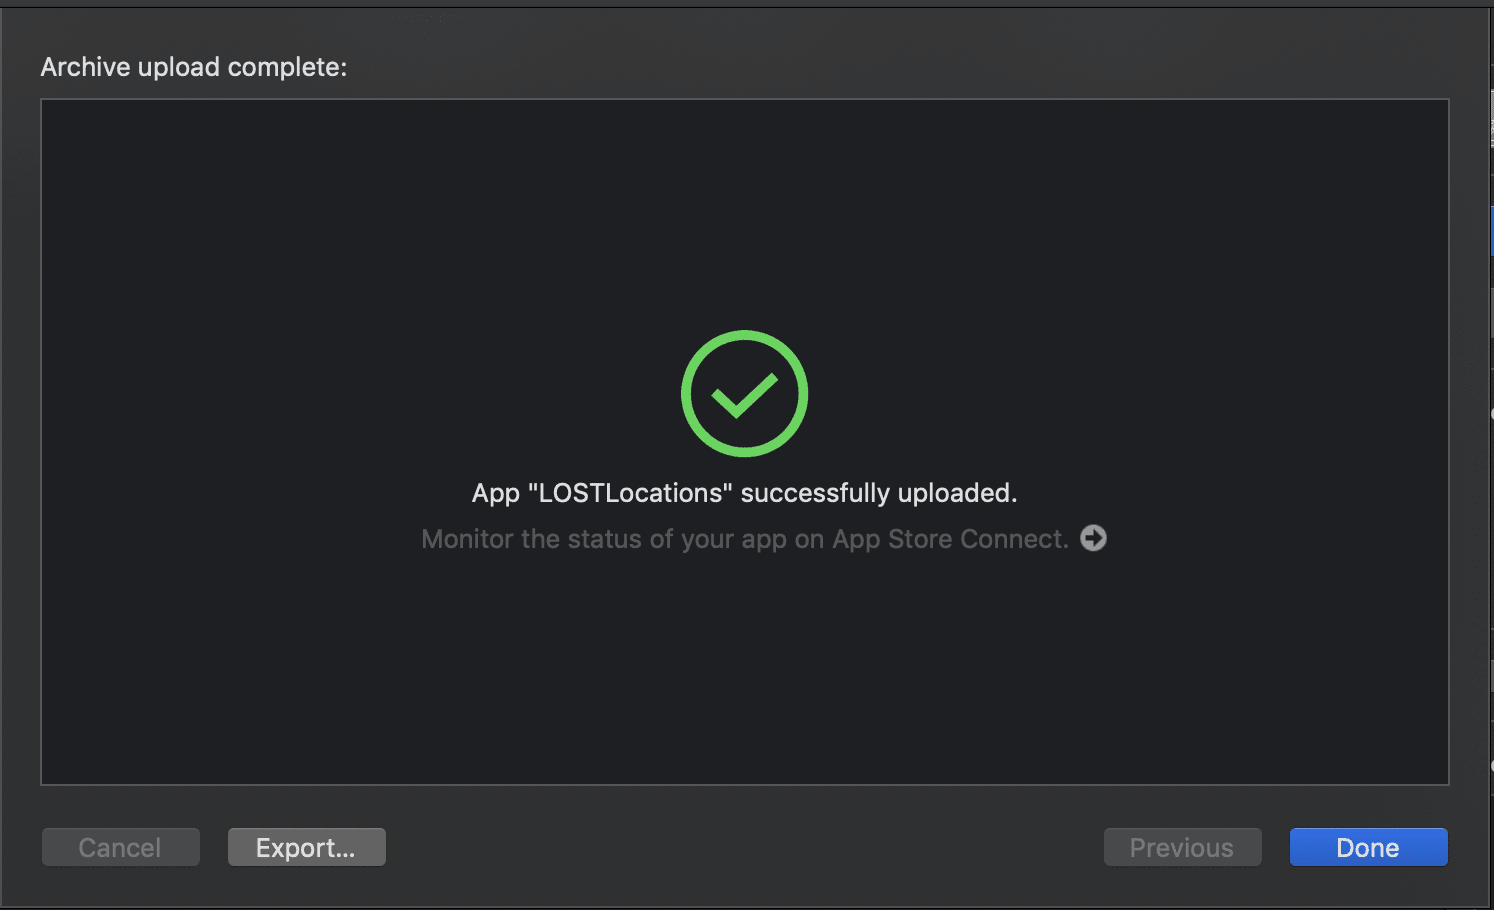
Step 10 :
Once completed, you will see a final window like this. Congratulations! Your app is halfway there to the iOS App Store. Click Done. Open your App on App Store Account.
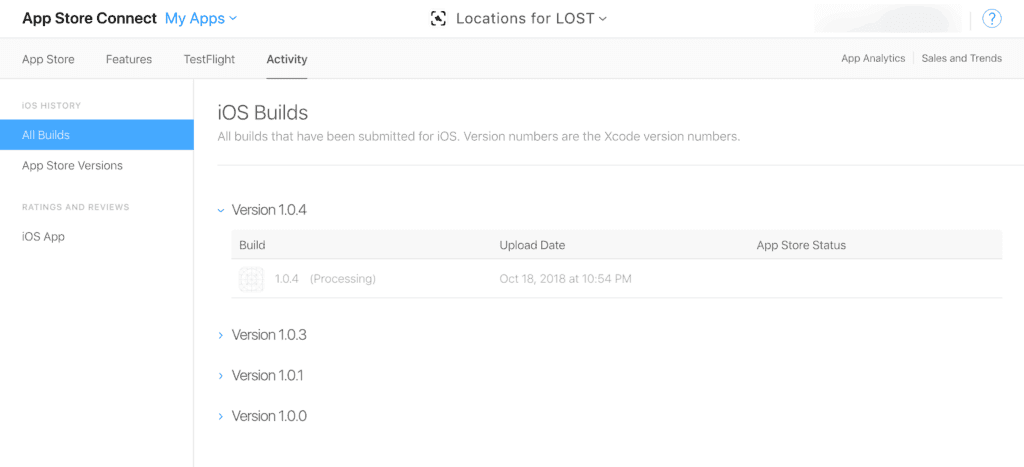
Step 11 :
App uploaded from Xcode will be displayed in build section as seen in below image :
Step 12 :
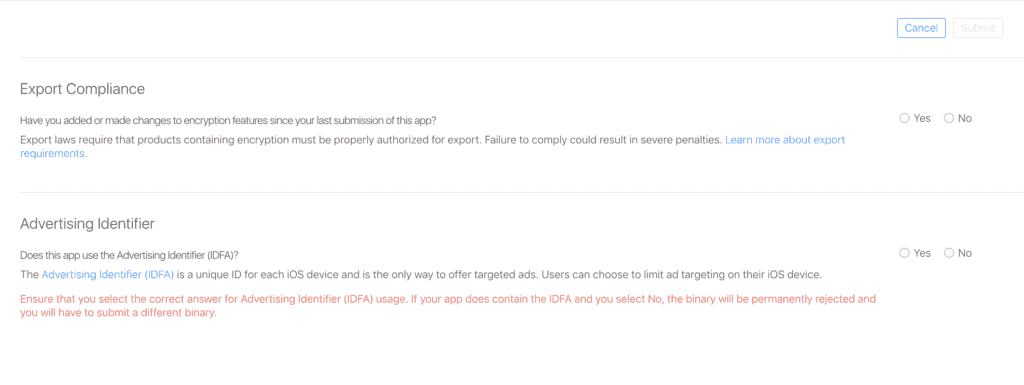
Select your build version app and click the save button on the top right corner of your screen and the Submit for Review button should get enabled.
You’ll have a couple of questions to answer about your app:
After that, your app will be on the waiting list for Apple’s certification and review team.
You just have to wait now. Your app takes 3-4 days for reviewing.
You will be notified on your email, one your app is approved.
Yay! Your app is available on App Store.
I hope you’ve enjoyed this tutorial and please share it with your friends and peer using the social buttons below!