
Upload Android App to Google Play Store | Android Beginner’s Guide
This post is for all those budding Android Developers whether or not he/she is fresher or experienced has to perform this one really obvious thing to reach out to their App Users and that is uploading the Android App on Google Play Store.
So just go through this post carefully and get your first app listed on the play store lightning fast:
Create Signed APK
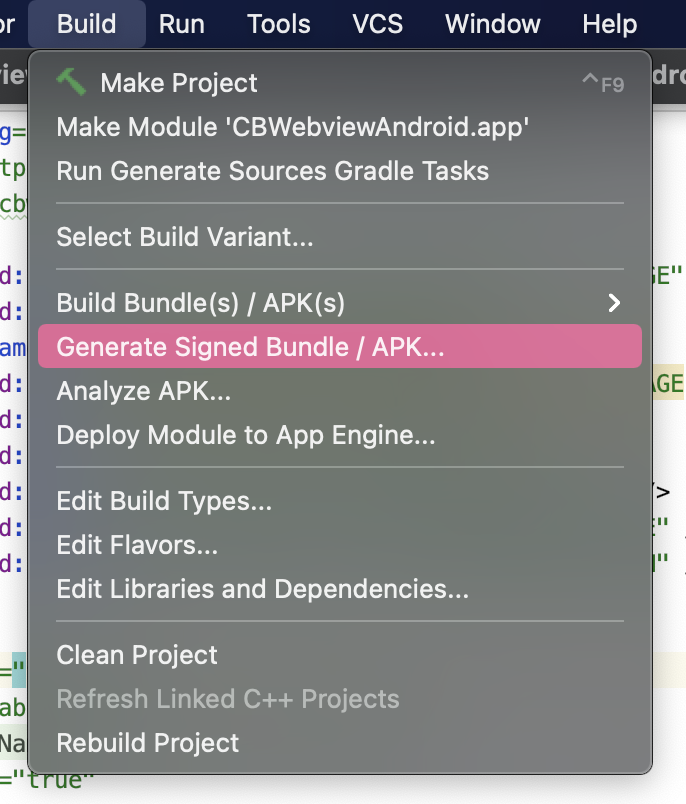
Step 1 :
Open project in Android Studio > Navigate to Build menu on the top > Click Generate Signed Bundle/APK
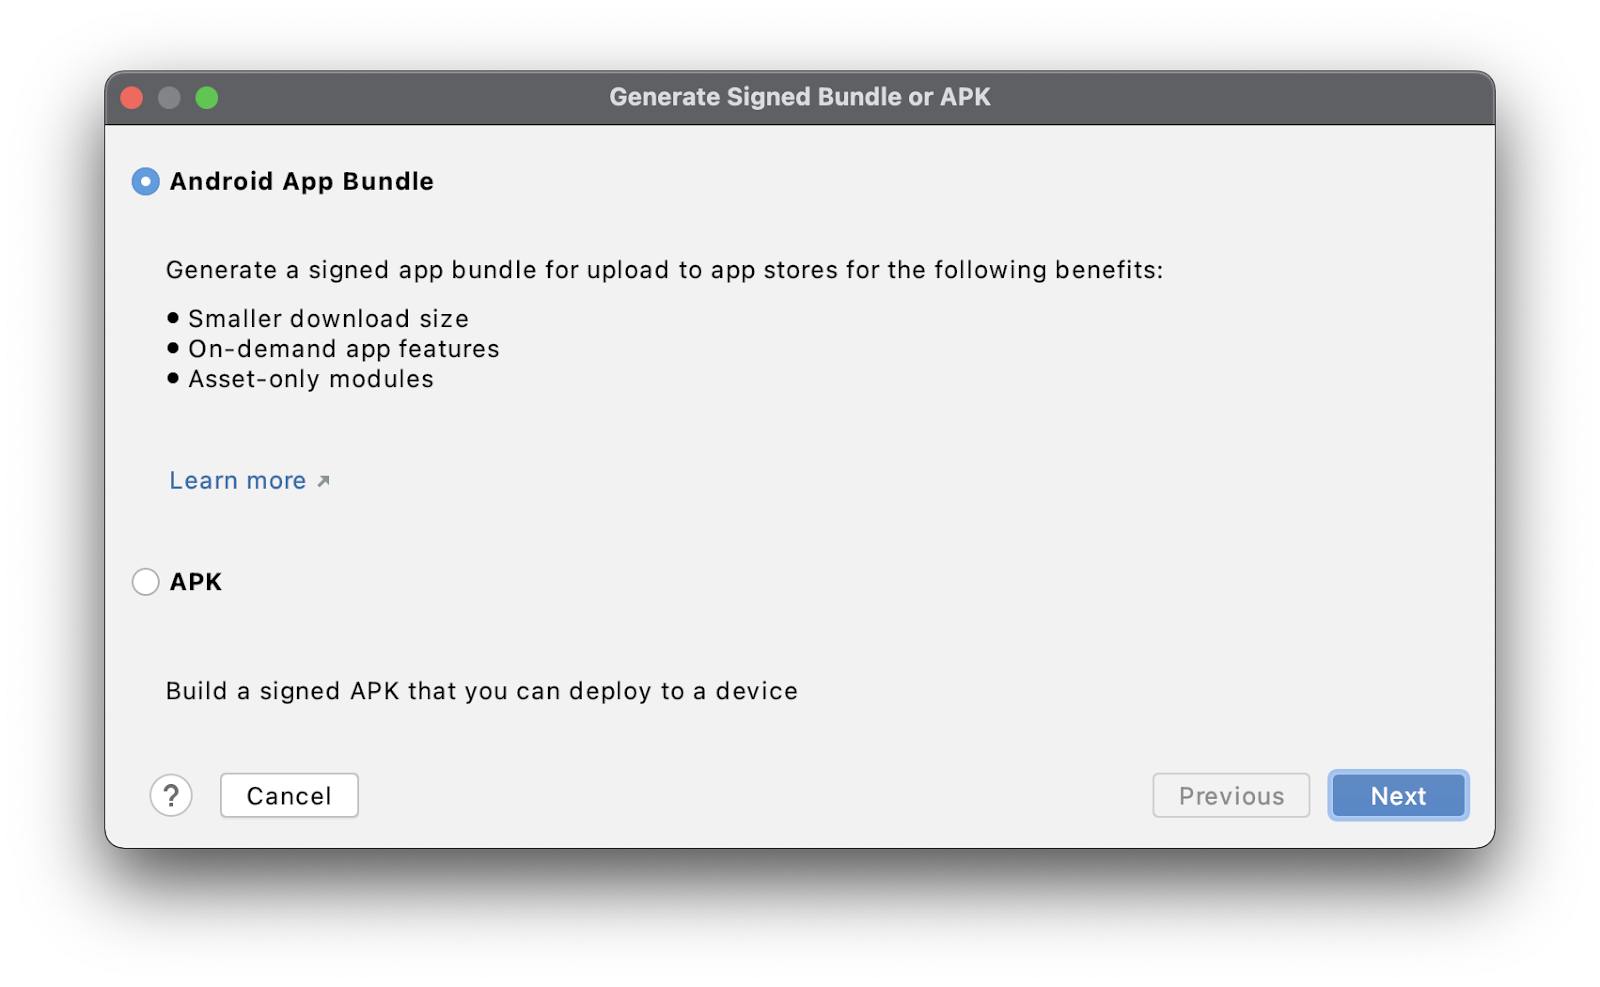
Step 2 :
Select Android App Bundle and click Next.
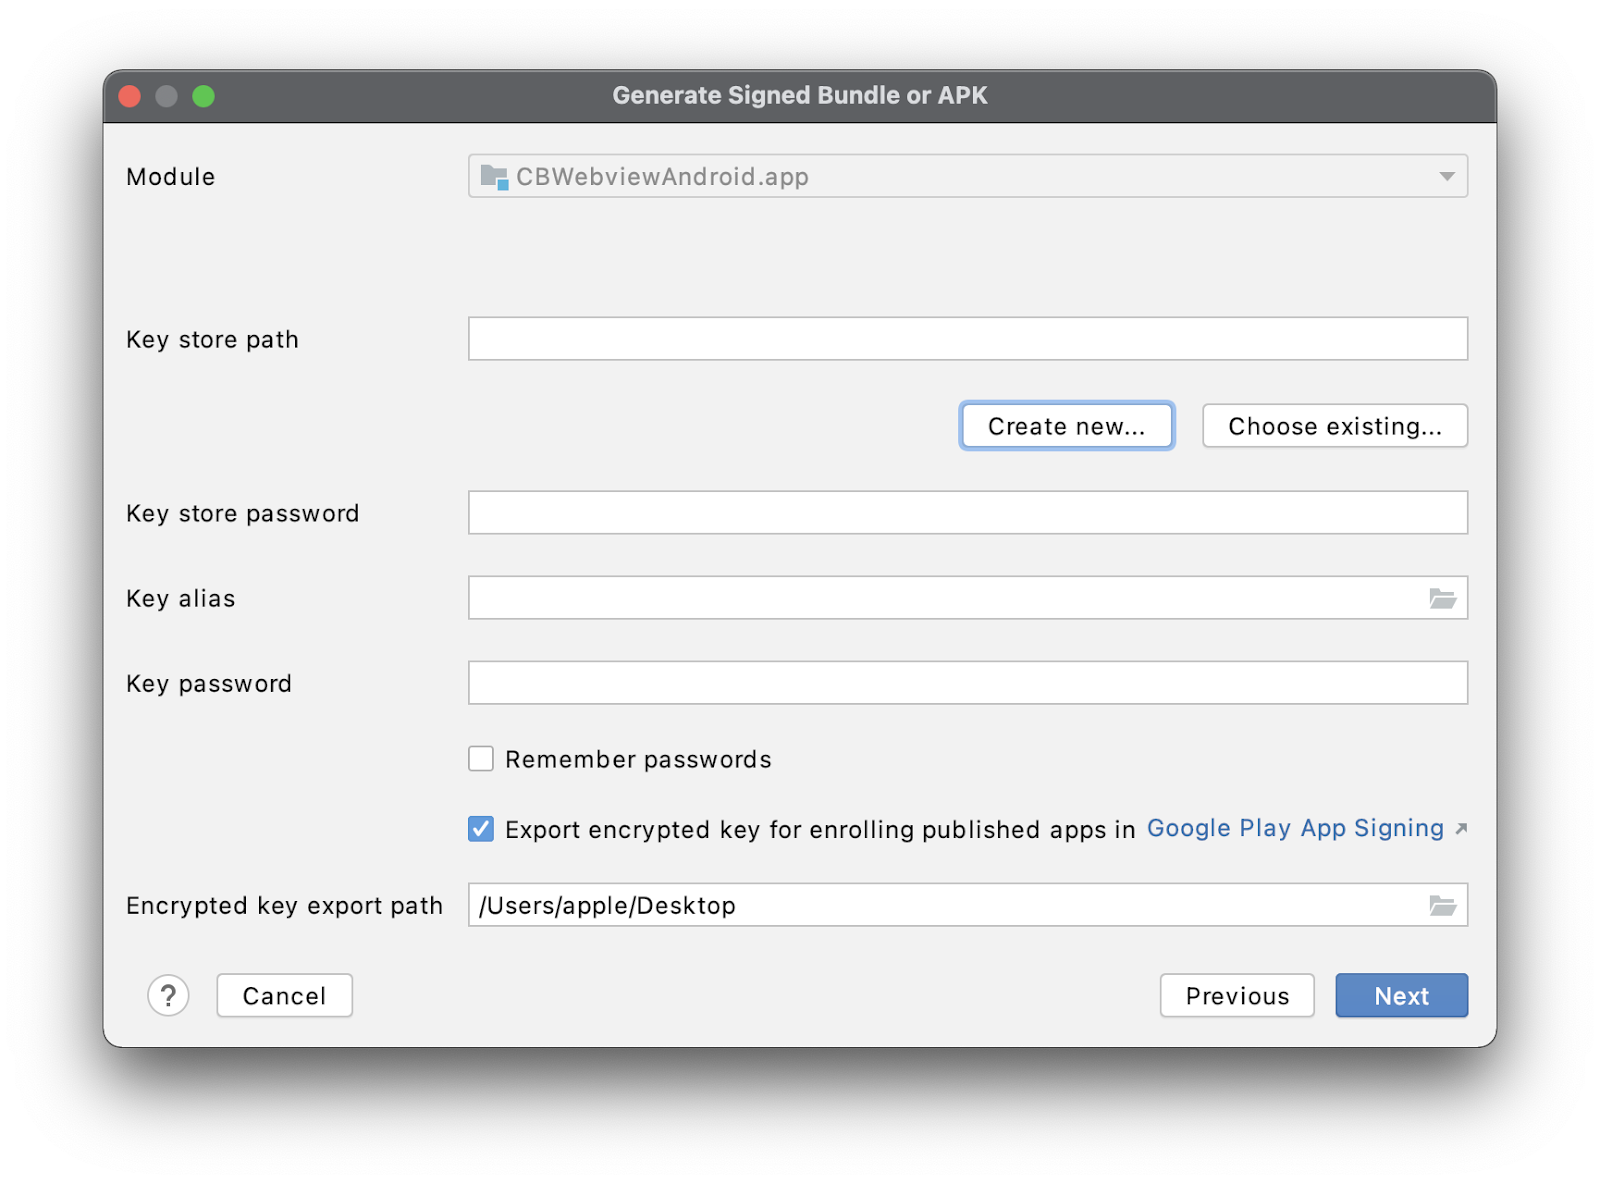
Step 3 :
Click over Create new to create Keystore path or if you already have Keystore path click over Choose existing.
Step 4 :
Click over the folder image to browse the folder path to save your Key store file.
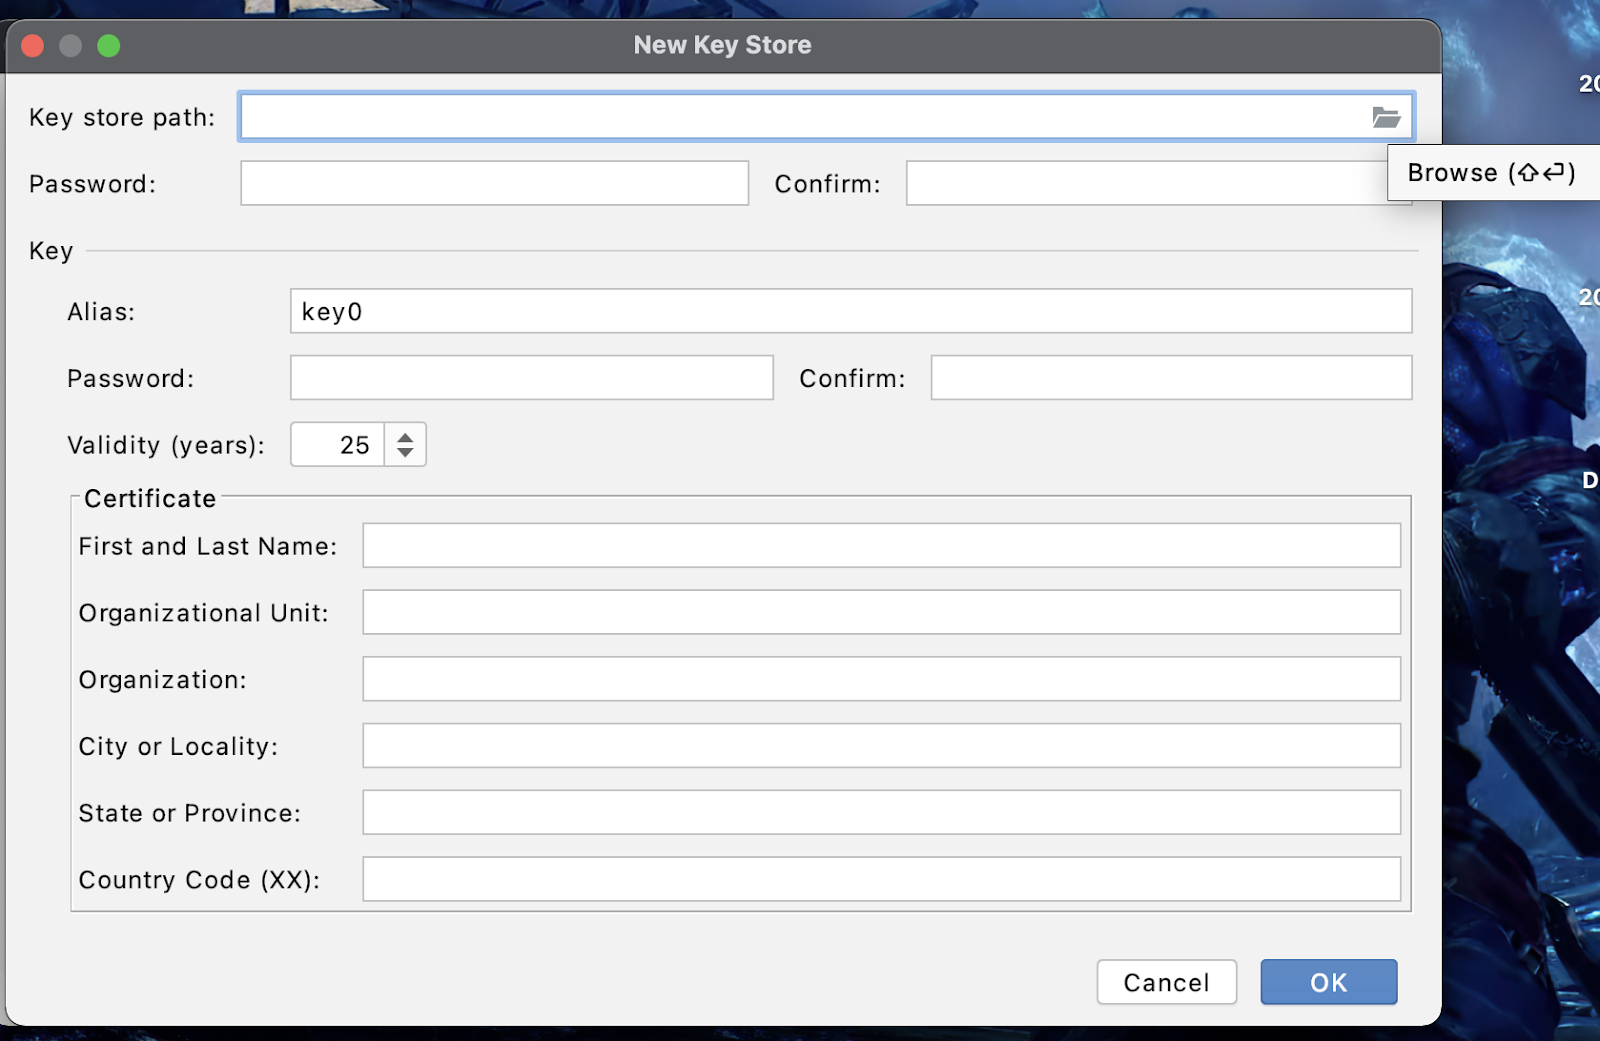
Step 5 :
Fill in all the details and Click OK.

Step 6 :
Sign In to your Gmail account and go to Google Play Console. You can also change your Gmail account for the console by clicking over your email id shown in the below screen.

Step 7 : Fill in your details and click over create account and pay
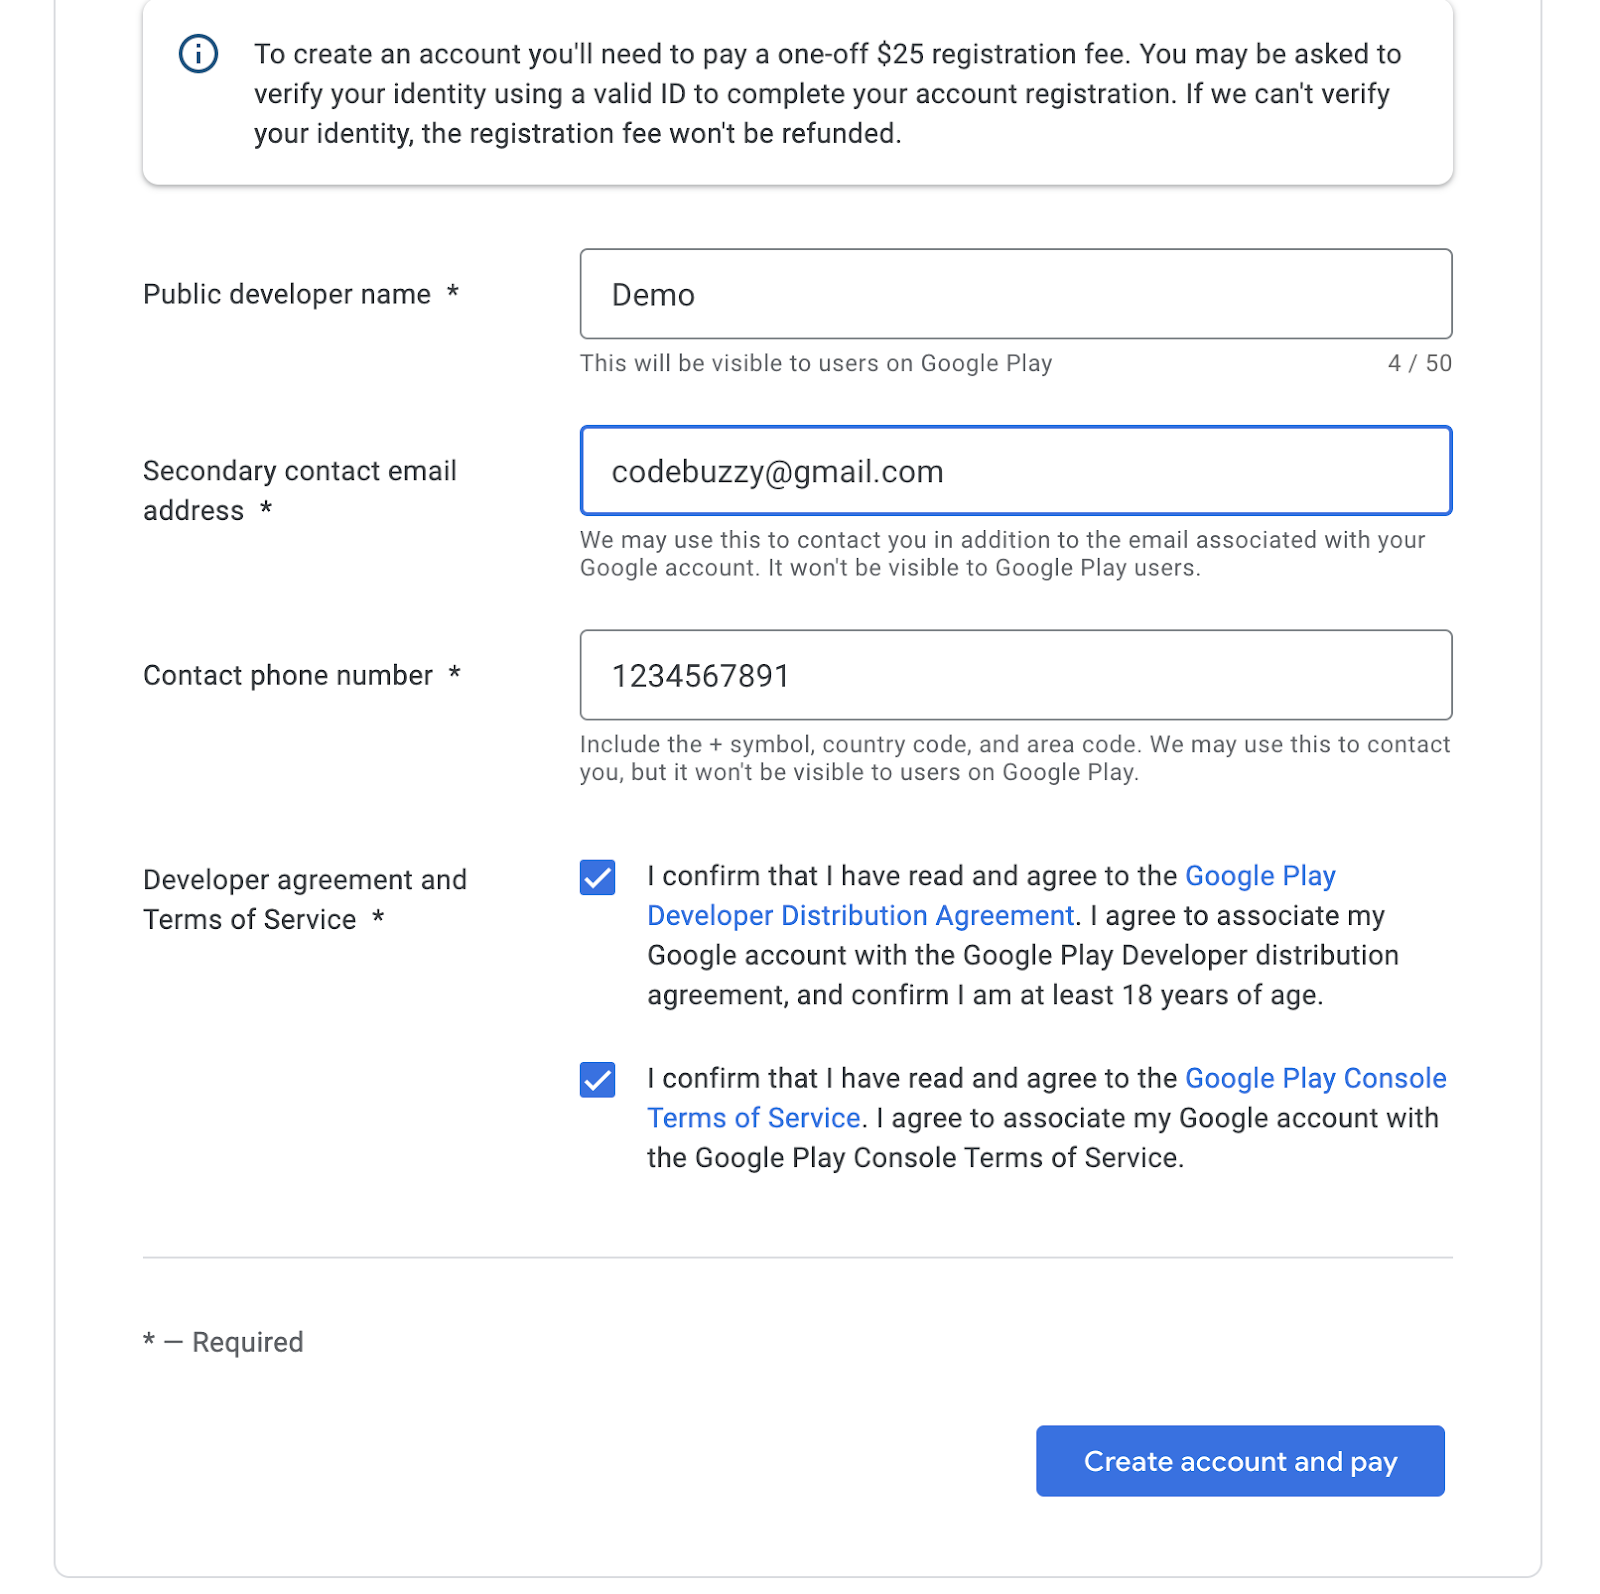
Note : It will charge you once in a lifetime fee i.e 25$. Just do it to start uploading your first app.
Step 8 :
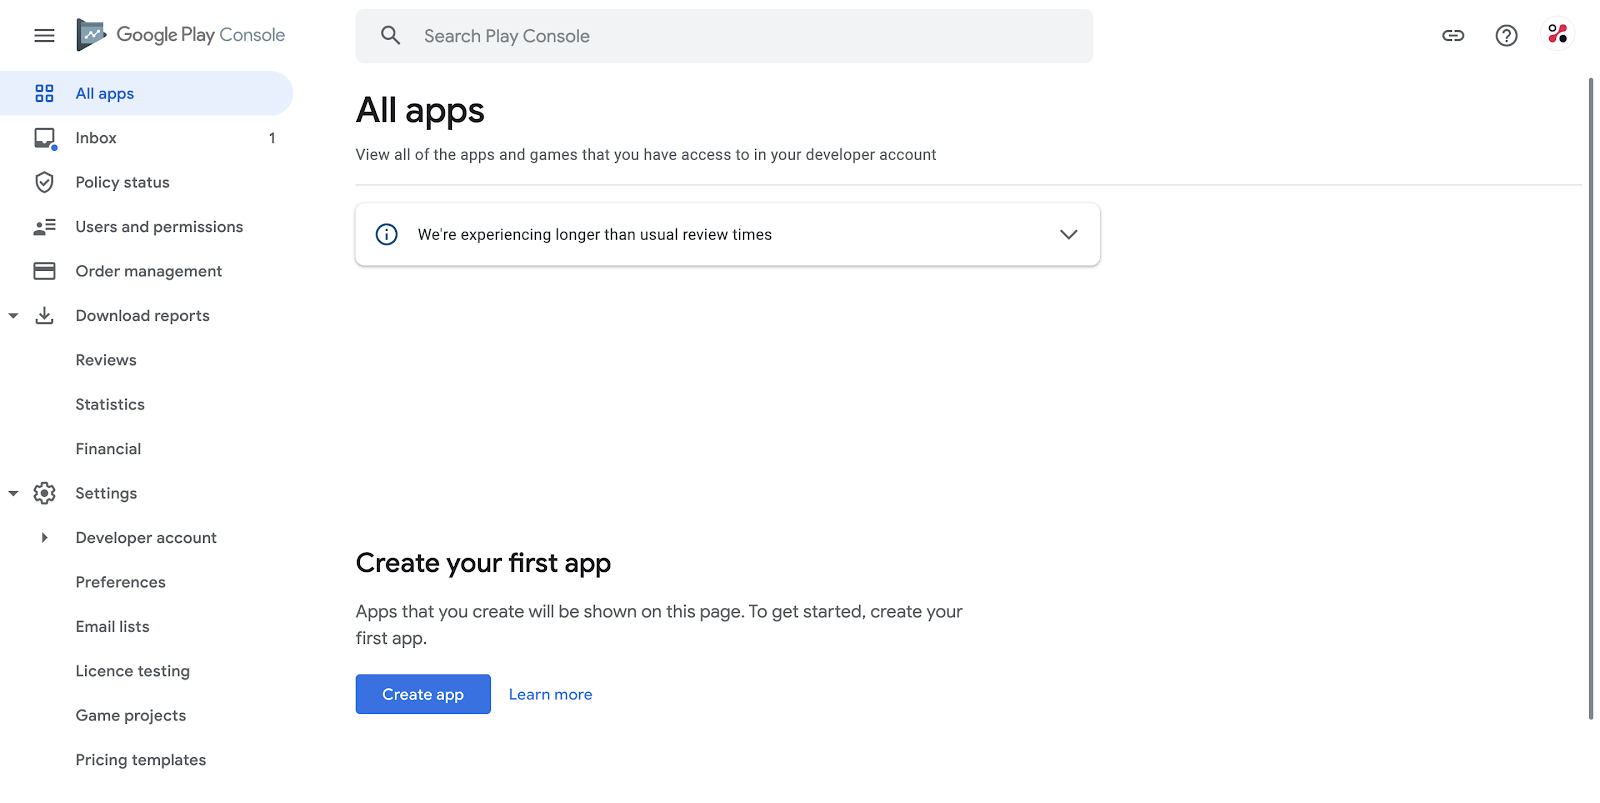
Once the payment is done, you will be navigated to Google Play Console Dashboard. Click Create App and fill in all the details asked.
Step 9 :
Once the details are filled in, head to Console Help to release the app. Once your app is released, it gets available over Google Play Store within 6-7 days or sometimes it may take longer.
2 thoughts on “Upload Android App to Google Play Store | Android Beginner’s Guide”
Nice work!
Incredible support and great article, very helpful