
How to add Google AdMob in the iOS App | Beginner’s iOS Guide 2020
Step 1 :
Before embedding Google Banner Admob in App, we need to register our app for AdMob Service. Click here to Sign Up for Google AdMob.
As AdMob is now part of Google, you can simply sign in with your Google account or register a new one. AdMob requires you to have a valid AdSense account and AdWords account. If you don’t have one or both of these accounts, follow the sign-up process and connect them to your Google Account.

Step 2 :
Once you are done with the sign-up process, you will be navigated to the dashboard page. In the navigation on your left, select the Apps option.
Step 3 :
Choose the Add Your First App option. AdMob will first ask you if your app has been published on the App Store. Assuming your app has not been published, choose the option “No”. We will register the app by filling in the form manually.
Set the app name to your app name and choose iOS for the platform option. Click Add to proceed to the next step. AdMob will then generate an App ID for the app. Please make a note of this app ID. We will need to add it to our app in order to integrate with AdMob.

Step 4 :
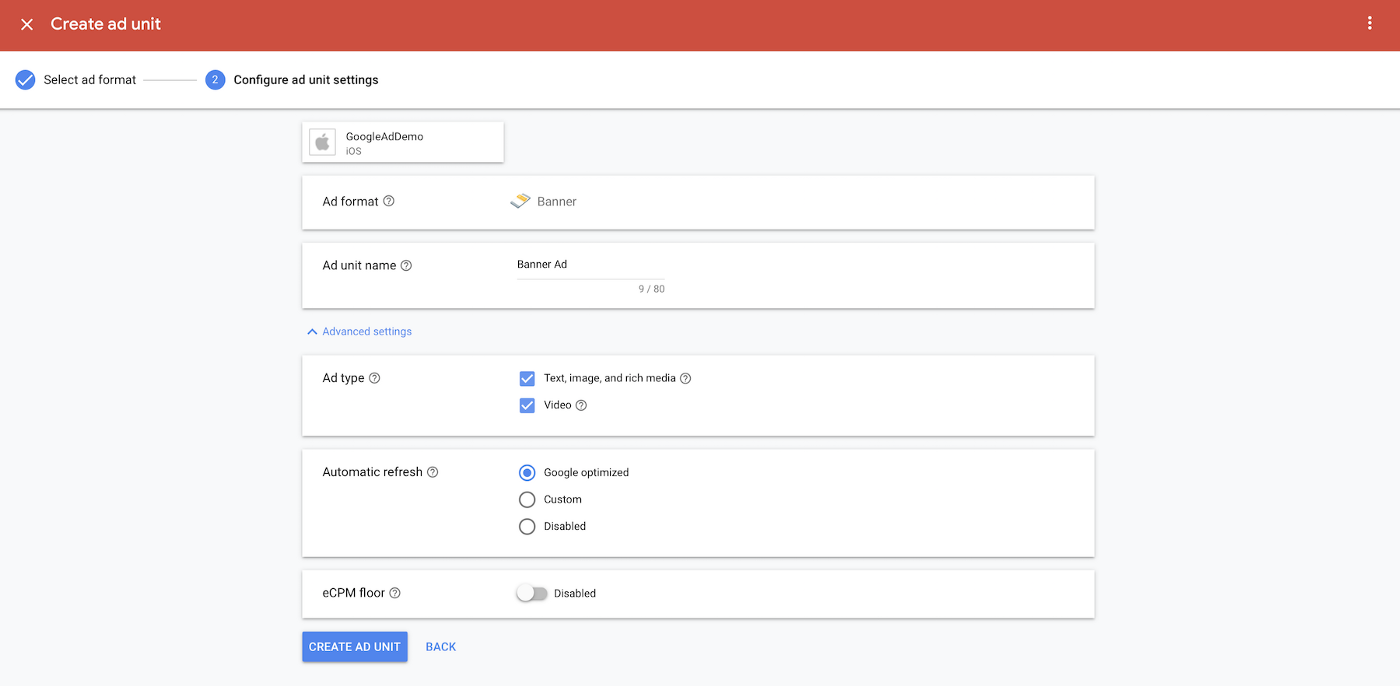
Next, we need to create at least an ad unit. Click Next: Create an Ad Unit to proceed. In this tutorial, we use the banner ad. Select Banner and accept the default options. For the Ad unit name, set it to Banner Ad.
Step 5 :
Click Save to generate the ad unit ID. This completes the configuration of your new app. You will find the App ID and Ad unit ID in the implementation instructions. Please save this information. We will need them in the later section when we integrate AdMob with our Xcode project.
Step 6 :
To integrate Google AdMob into your app, the first thing you need to do is install the Google Mobile Ads framework into the Xcode project.
If you need to do it yourself, all you need is to create a Podfile in your Xcode project, and then add the following line to your app’s target in the file:
pod 'Google-Mobile-Ads-SDK'Then you run pod install to grab the SDK and let CocoaPods integrate the SDK into your Xcode project. Anyway, I assume you use the starter project to follow this tutorial.
Step 7 :
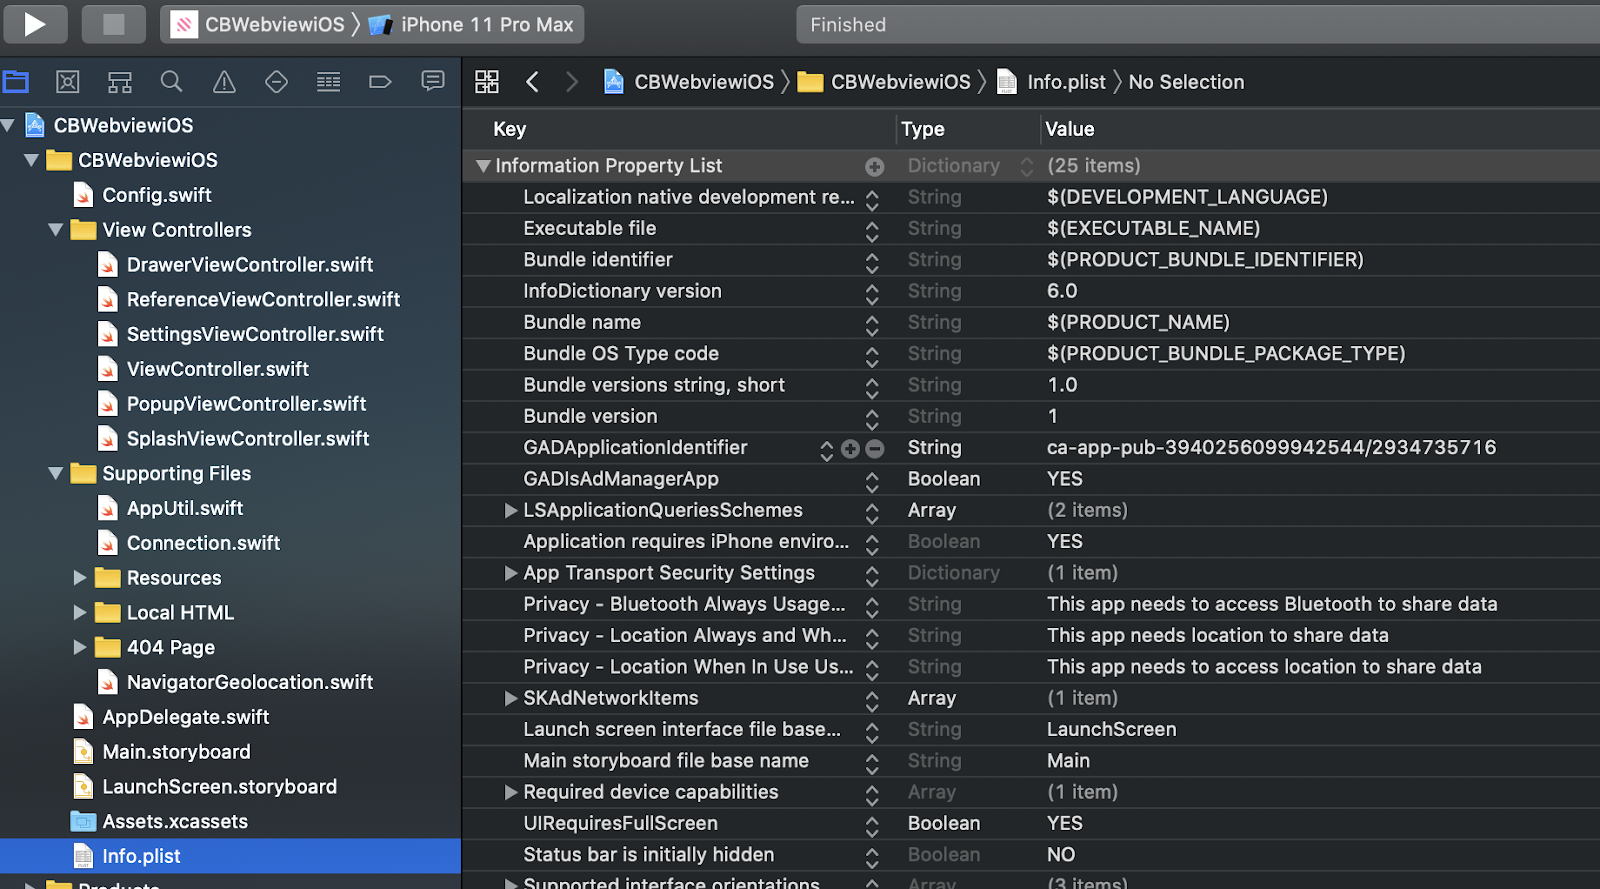
Go to Info.plist and add your AdMob ID. Info.plist list contains the app related permissions and data.
Step 8 :
To use the Google Mobile Ads SDK in your code, you will have to import the framework and register your App ID. We will do the initialization in the AppDelegate.swift file. Insert the import statement at the beginning of the file:
import GoogleMobileAdsStep 9 :
Next, insert the following line of code in the application(_:didFinishLaunchingWithOptions:) method:
func application(_ application: UIApplication, didFinishLaunchingWithOptions launchOptions: [UIApplication.LaunchOptionsKey: Any]?) -> Bool {
        GADMobileAds.sharedInstance().start(completionHandler: nil)

        return true
}
Step 10 :
Open Viewcontroller where you want to display Banner Ad. First, import the GoogleMobileAds framework:
import GoogleMobileAdsNext, declare a variable of the type GADBannerView. This is the variable for holding the banner view:
 bannerView = GADBannerView(adSize: kGADAdSizeBanner)
        addBannerViewToView(bannerView)
        bannerView.adUnitID = Bundle.main.infoDictionary!["GADApplicationIdentifier"] as? String
        bannerView.rootViewController = self
        bannerView.load(GADRequest())
In the code above, we use a closure to initialize the adBannerView variable, which is an instance of GADBannerView. During the initialization, we tell the SDK that we want to retrieve a default banner size using kGADAdSizeBanner.
We initiate a GADRequest object and set testDevices to our test devices, which include the built-in simulator (i.e. kGADSimulatorID) and the sample device ID. If you want to test it on your iPhone/iPad, please make sure you replace the sample ID with your own device ID. You can find the device ID by connecting your iPhone to Mac and then open Window > Device and Simulator in Xcode.
You may wonder why you need to define the test devices. What if you omit that line of code? Your app will work and display ads. But it’s Google’s policy that you have to comply with.
Now you’re ready to test the app. After launching the app, you should see an ad.

