
How to change project name iOS Xcode | Beginner’s iOS Guide 2021
Unfortunately, the process of refactoring can get a bit complicated in Xcode 11 especially if you are using Cocoapods, additional libraries, or have several subfolders and schemas. In this short tutorial, I will explain how to comprehensively rename your Xcode project without breaking anything in 7 straightforward steps.
Step 1 :
- Open “your_project_name.xcodeproj” .
- Select the project you want to rename in the “Project Navigator” which can be found on the left side of the Xcode view.
- On the right-hand side of the window, select the “File Inspector”. The name of your project should be in there under “Identity and Type”, change it to the new project name and press Enter.
Step 2 :
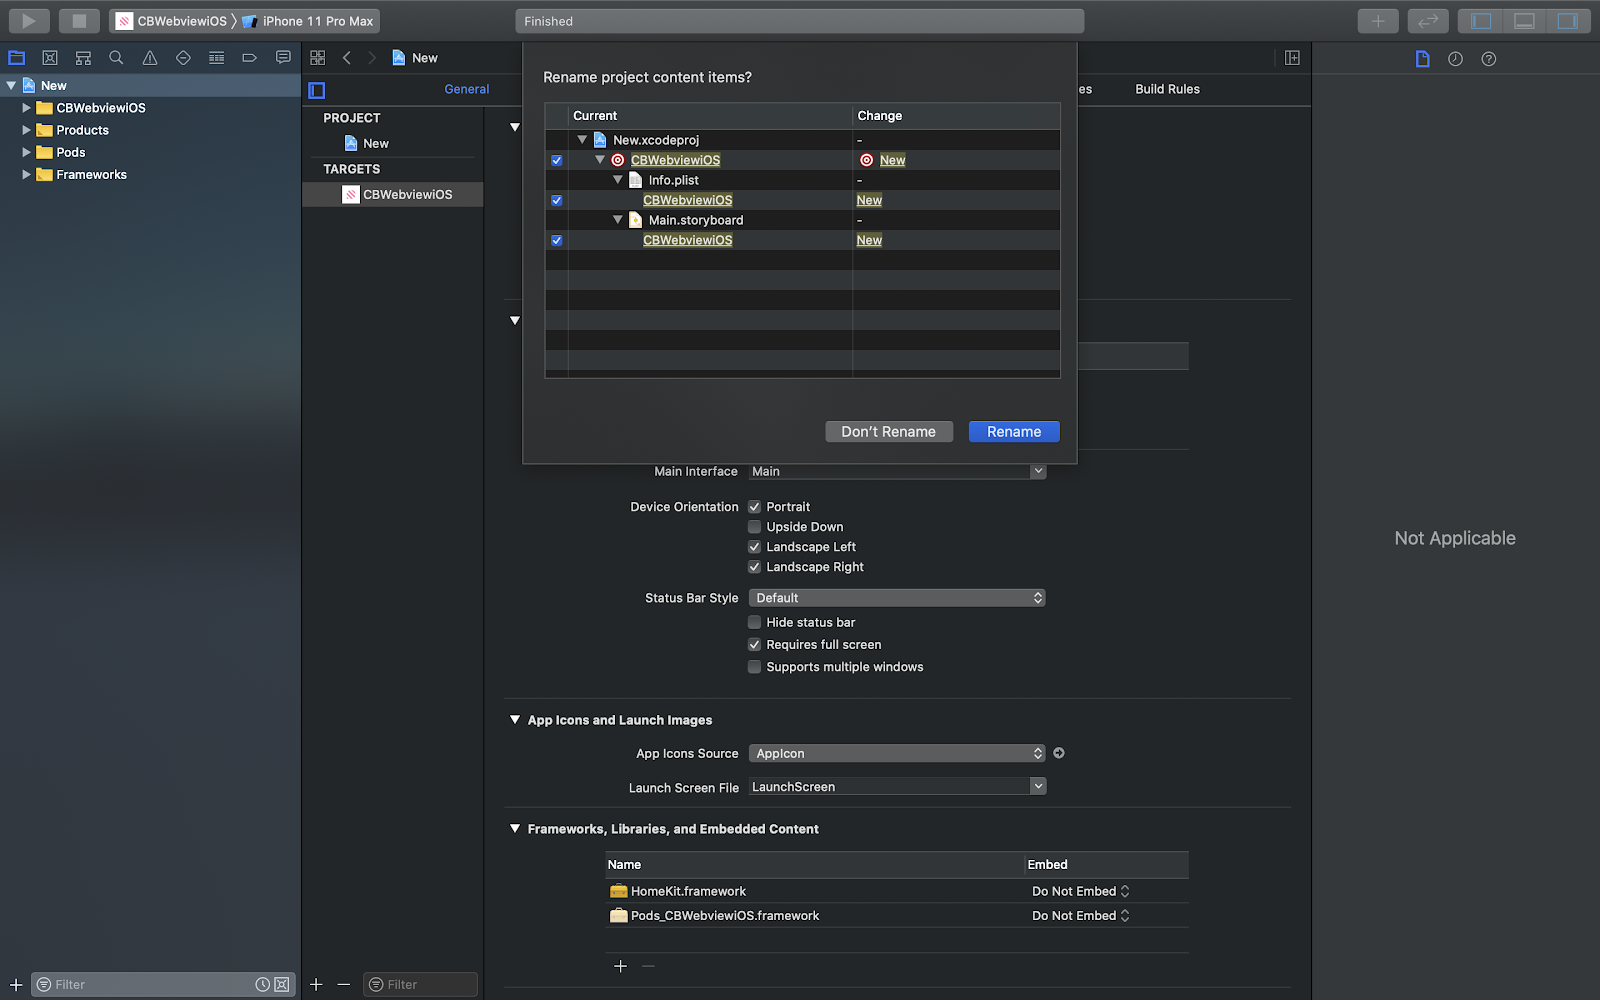
A dialog will pop up, listing the items in your project that can be renamed. Confirm everything looks right and click “Rename”
Step 3 :
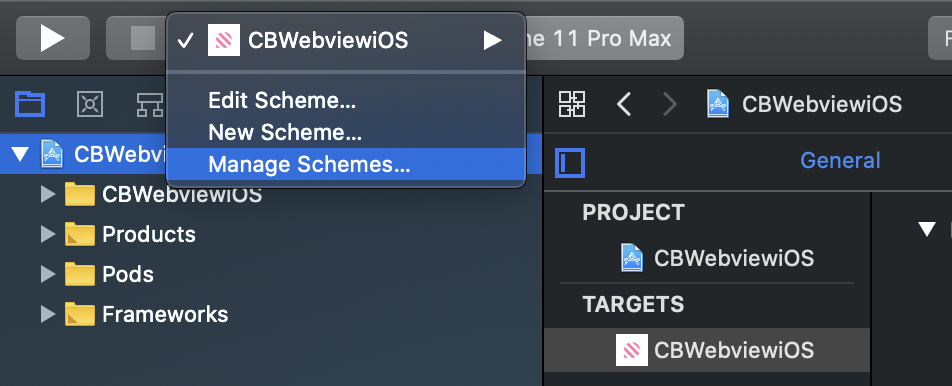
Let’s rename the project schema,
- In the top bar (near the “Stop” button), there is a scheme with your old project name, click on it, then go to “Manage Schemes”. Alternatively, you can find “Manage Schemes” here: Product > Scheme > Manage Schemes
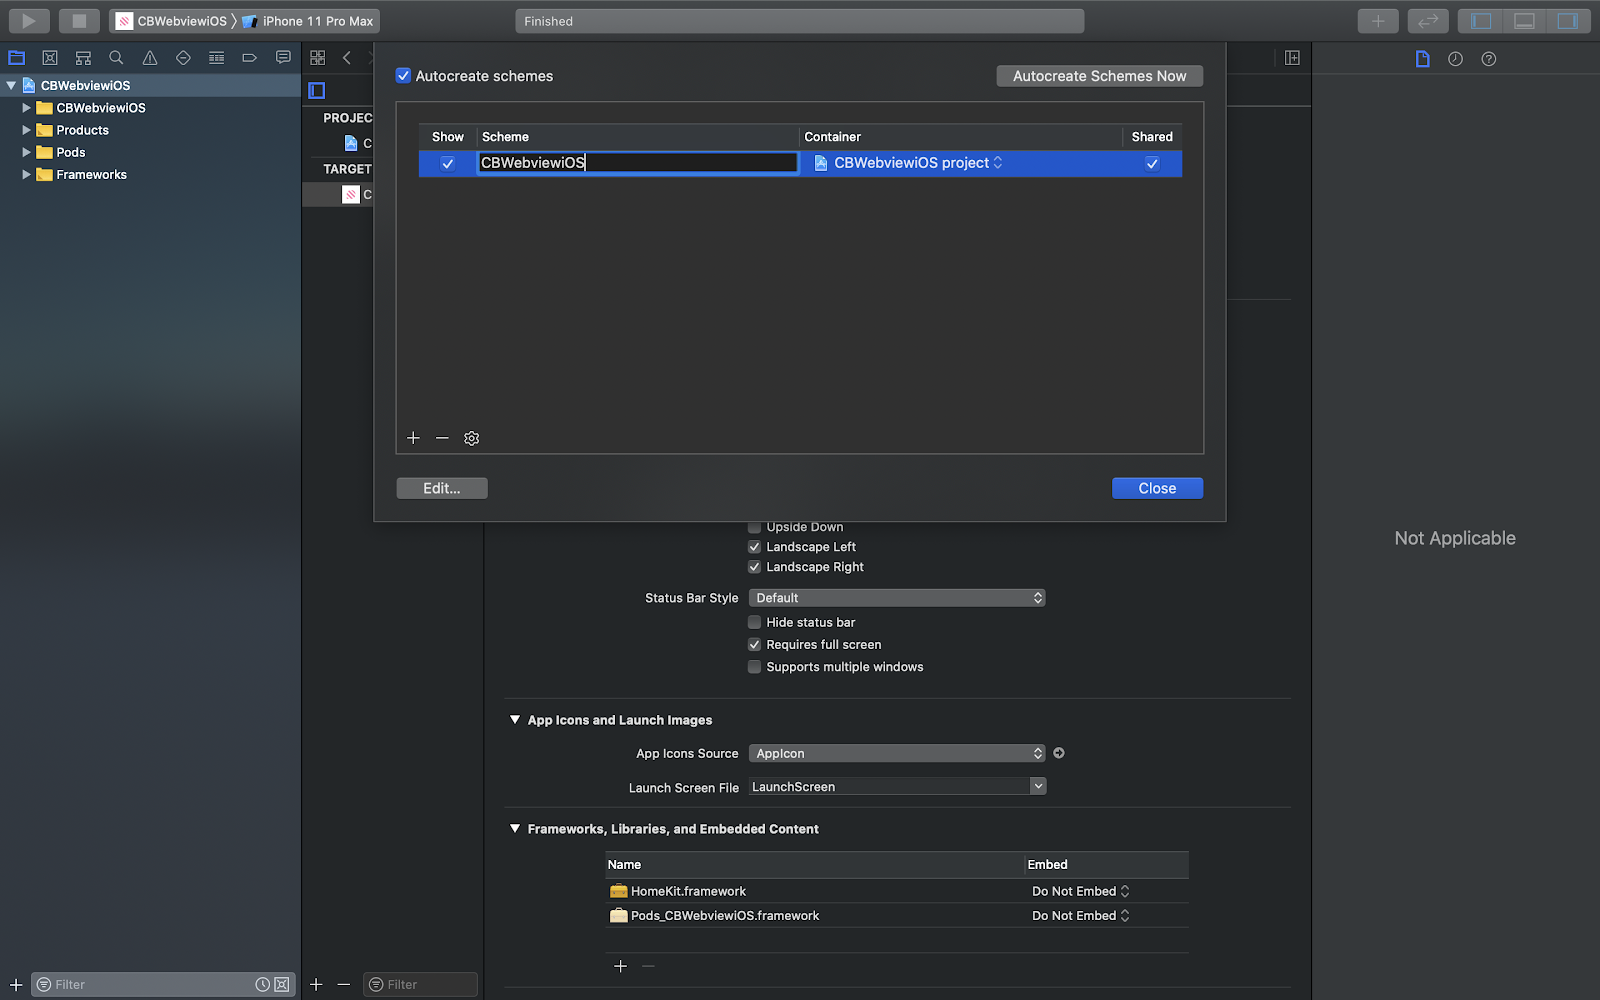
- You will see a popup displaying the project’s old name, select it, and click “Enter”. The project name will be editable now.
- Replace the old project name with the new name and click “Enter”.
- Click Done and quit Xcode.
Step 4 :
Let’s rename the assets folder :
- Open your project folder and rename “old_project_name.xcworkspace” to “new_project_name.xcworkspace”.
- In the correct named master folder, there will be a newly named .xcodeproj file with the wrong named “old project name” folder. Rename the “old name” folder with “new project name”.
Step 5 :
Next, we got to rename Podfile:
- Open terminal, cd to your project directory, and open Podfile. You will see a target clause with an “old project” name, change it to the new name and save.
- Run the command pod deintegrate so Cocoapods will delete all pod related configs, scripts, generated framework as well as the Pods/ directory.
- Now execute pod install to recreate all Cocoapods resources.
Step 6 :
Lastly, we got to update the project name in info.plist list.
- Reopen your Xcode project. You will see the following warning: “The folder “old project name” does not exist”, dismiss the warning and continue with the following steps.
- In the “Project Navigator” on the left, you will see the old folder name. Click on the folder icon in “File Inspector”, open Finder, and navigate to the new internal folder from the new project folder.
- Go to “Project Navigator” > [Your project name] > Build Settings > Packaging > Info.plist, and change the path’s substring from old project name to new project name.
- Do the same for the “Product Identifier”.

Step 7 :
Clean and build your project using Command + Shift + K to clean and Command + B to build.